

The Why
At first, let us understand WHY do we need to test our application for different network conditions
While developing applications, we experience performance based on our home network and we optimize the performance with our network in reference. We fail to consider performance optimizations for situations where there could be an unstable network or low network coverage.
Testing our application for different network conditions helps us optimize our applications for them thus improving the overall UX.
Now, these can be done via the built-in dev tools’ network tab in the browser, publicly available APIs that respond with delay, browser extensions that add delay to the network request, and other similar methods.
So what’s the need to automate then?
Because automation is fun. Why do something manually when you can just automate that with a code snippet written taking a decade long time ” clears throat “

The How
Now, let’s dive deep into the implementation.
Let’s get Automating!

Approach 1: Using Selenium Chromedriver API for Network Emulation
Since we’re gonna use selenium, let’s first install the selenium npm package
npm install selenium-webdriver
Run this on your project directory terminal and we’ve installed selenium as a dependency for the project.
We also need the driver for the specific browser we’re going to test our application on. In this blog, we’ll be focusing on the Chrome browser. You can find the link to that here.
Now that these are out of the way, let’s get writing some code.
Let’s start by importing few parts from the selenium package.
Now, let’s write the function where the main code would stay
If we run this function, we would experience a slower speed than usual. But there are a few downsides to this code.
- It throttles the entire network and not a specific website
- You can’t throttle a specific network request
Now let’s find out how can we overcome these downsides with our next approach.
Approach 2: Using Requestly’s Selenium Package to Throttle Specific Network Request
The selenium package from Requestly offers us the ability to create network request specific rules. We’ll be discussing their Delay Network Request feature.
For using this package, we need to create a rule first in the Requestly client and then use that rule to delay any network request.
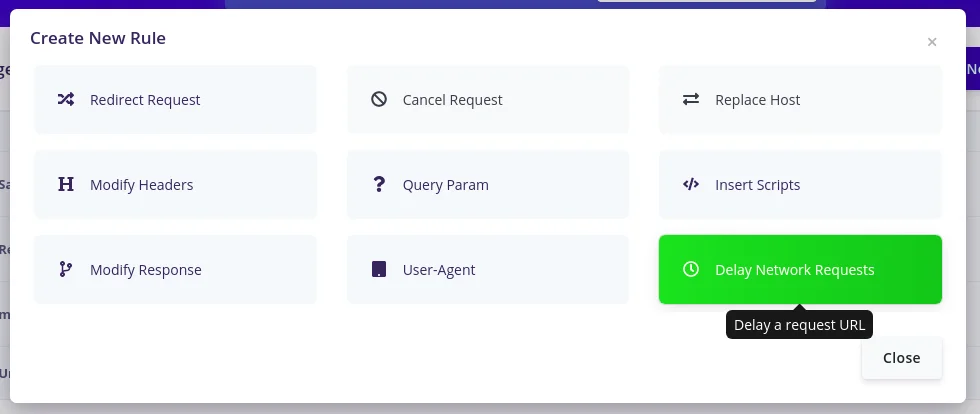
Head on to requestly’s application and click on the New Rule Button, a popup would open up showing the types of rules we can create. For the time being, select delay network request.
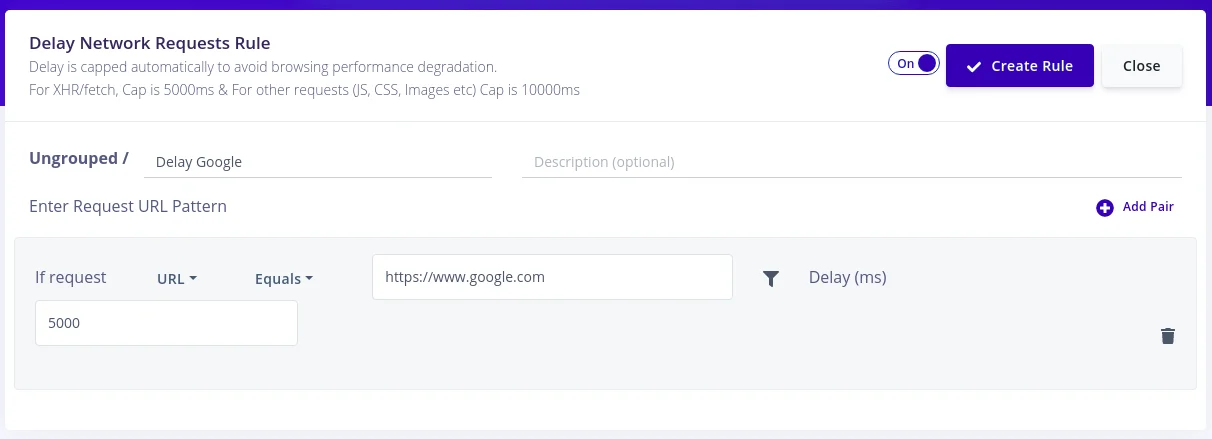
Now add the URL of the network request you want to delay and add the delay time in milliseconds
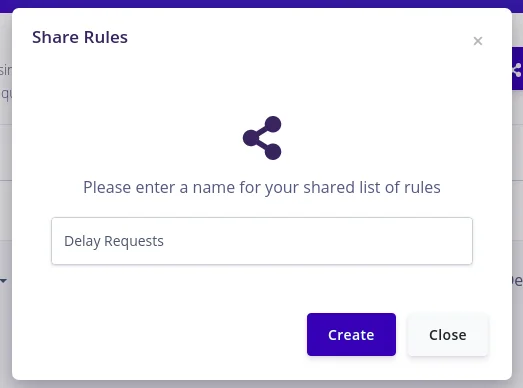
Now we need to get the link to the rule so that we can use that to import the rule.
For that, click on Save Rule and then Share Rule. A popup would appear asking you to name the shared list where this rule would live in. Name it and click on create.
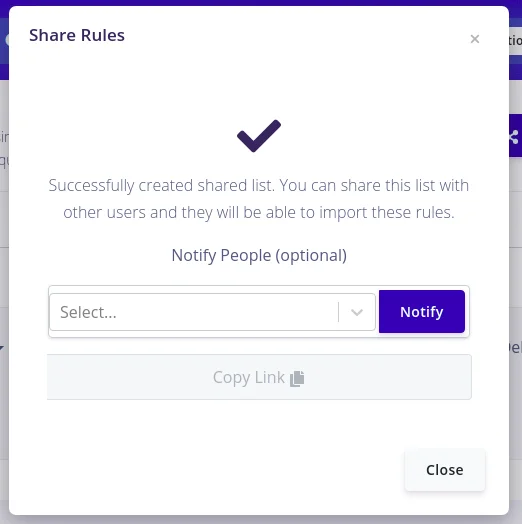
Now a popup with an option to copy the shared list link would appear. Copy that and keep it handy, we’d require it in our code.
Phew, that was a lot! Now finally we get to implement it in our code.
Let’s start by installing the dependencies and importing them into our project
Now that we’ve all the dependencies into our project, let’s create a variable to store our shared list link
We now have all the components to write our function.
Now, if you try to run the function, you would have the exact behavior as before but with a lot more control over all the network requests and without any downside, we had before.
You, my friend, are a power user now 😉.


